Welcome 3 Birds Fans! We know many of you are starting to receive your 3 Birds Quill Ease Quilling Tools from HSN, so we thought it would be helpful to share a brief video with you about the basics of how to use your new motorized quilling tool.
http://youtu.be/wb3RMNNThg4?list=UUsNPDBe679yriCv5KREEz7Q
If you have any questions, you can leave a comment below or on our Facebook Page.
We hope you have fun quilling and crafting with your Quill Ease Quilling Tool!
Wednesday, July 30, 2014
Tuesday, July 29, 2014
Double Page Scrapbook Layout
It’s Katrina on the blog here today. I know, again?! But hey, I have something totally different than I did for yesterday!
Double page layouts, I will not lie, are a little hard for me. So, I generally use a sketch. This one is no exception, but I did change the sketch up quite a bit, by adding more to the layout than what was originally on there.
 Random is not one of my strong suits, I wish that it was. So, I have a tendency to keep everything very linear and more in line than I do on a one page layout. Note the journaling tag is even lined up!
 And in the picture above and this next picture, do you see some new 3 Birds? Yes, there is a Pearlescent & Foil Goodie Box coming soon as well as some For All Seasons Cards. I used one of the Summer themed cards for my title!
 The Midday Medley 3D Embellishments are so fun to mix along with other things to make your own unique embellishments. One of my go to supplies is a doily!
 The Sticker Flair Kit has such a variety. I love these foil chevron stickers in the package. AND there are more varieties than just these. This sticker collection is becoming a must on my projects!
 I have another layout - title Along The Fence Row - on my personal blog, Paper, Scissors and Glue. It’s another picture from this same day that coordinates with this layout.
Be sure to be watching for more details about the new goodies here on our blog and on our 3 Birds Facebook Page!
Katrina Hunt - Paper, Scissors and Glue
SUPPLIES | Midday Medley 12 x 12 Paper Pad, Sticker Flair Set, Midday Medley 3D Embellishment Set, Graceful Season 12 x 12 Paper Pad, Pearlescent & Foil Goodie Box (Coming Soon to HSN), All Season Cards Set (Coming Soon to HSN)
Other Supplies: Scrapbook Generation’s Sketches for Scrapbooking Vol. 8, Therm O Web Adhesive, Silhouette Cameo
Monday, July 28, 2014
iPhone Moments Mini Album
Do you take pictures with your phone? It’s Katrina today and I have a mini album to share with you filled with moments captured from my iPhone!
I started off with one of the WeRMemory Keepers Instagram albums. These are perfect for square photos and I wanted this album to be on the smaller side, but in an album form more than a chipboard mini album.
I went to work with lots of 3 Birds Design from the items in the Midday Medley collection. I added embellishments to the front of the album, just placing them right on the cover.

Then I went to work putting my album together. Using items within a collection will make it easier to complete something like this quickly, since everything is already coordinated!


 I kind of just went thru a typical weekend day for us, just random shots! I also used some photo apps on some of the pictures, because it’s just something I do all the time!

 Love the vellum that comes in the Midday Medley 12x12 paper pad! I love it so much, it hurt to cut it, but the green arrows looked really cute in the little squares of the pocket page.


 And wrapping it up at the very end! Don’t be afraid to put the embellishments on the outside of your pages. It just takes a little planning.


To see the rest of the pages of my iPhone Mini Album, visit my blog - Paper, Scissors and Glue.
And don’t forget, all these products that I did my mini album with are available at HSN.com!
Katrina Hunt - Paper, Scissors and Glue
SUPPLIES | Graceful Season Sticky Sparkly Chipboard Shapes, Graceful Season 3D Embellishment Collection, Midday Medley Paper Collection, Sticker Flair Cardstock Mega Kit, Midday Medley Timeless Stamp Kit, Midday Medley 3D Embellishment Collection
I started off with one of the WeRMemory Keepers Instagram albums. These are perfect for square photos and I wanted this album to be on the smaller side, but in an album form more than a chipboard mini album.
I went to work with lots of 3 Birds Design from the items in the Midday Medley collection. I added embellishments to the front of the album, just placing them right on the cover.
Then I went to work putting my album together. Using items within a collection will make it easier to complete something like this quickly, since everything is already coordinated!
I kind of just went thru a typical weekend day for us, just random shots! I also used some photo apps on some of the pictures, because it’s just something I do all the time!Love the vellum that comes in the Midday Medley 12x12 paper pad! I love it so much, it hurt to cut it, but the green arrows looked really cute in the little squares of the pocket page.And wrapping it up at the very end! Don’t be afraid to put the embellishments on the outside of your pages. It just takes a little planning.
To see the rest of the pages of my iPhone Mini Album, visit my blog - Paper, Scissors and Glue.
And don’t forget, all these products that I did my mini album with are available at HSN.com!
Katrina Hunt - Paper, Scissors and Glue
SUPPLIES | Graceful Season Sticky Sparkly Chipboard Shapes, Graceful Season 3D Embellishment Collection, Midday Medley Paper Collection, Sticker Flair Cardstock Mega Kit, Midday Medley Timeless Stamp Kit, Midday Medley 3D Embellishment Collection
Sunday, July 27, 2014
Altered Chalk Board
Hi everyone! Robbie here today sharing an Altered Chalkboard that I came up with. I am loving the chalkboard craze lately and I couldn't resist this little chalkboard that was done as an easel. I've seen these in several places, but this one I picked up at World Market.

The first step before you start to decorate your chalkboard is the scallops that are painted on the chalkboard. I used a Sharpie paint pen to paint these. Super quick and easy.
DESIGNER TIP | Don't worry about perfection! Just go for it! You will see that mine aren't perfect. For a chalkboard, I actually liked the look. Odds are that the writing on a chalkboard won't be perfect either! It's more about the overall effect.

To cover the base, I cut strips of the black polka dot paper to the width of each of the sides. I cut the pink striped paper 1/2 inch wider than the width of the black and punched all the edges using my Fiskars scalloped border punch.
Glue the pink first and then layer the black over the top.
Use the left-over black pieces to cover the legs of the easel.
Be sure to cut the chalkboard tray pieces, too.

Next up is the fun part! Decorating!! Of course, being a flower lover, I went with quilled roses for the main element of my embellishing. I added a little banner from the layered sticker sheet, a few punched flowers and I was ready to finish this little chalkboard.

Because I will actually use this, I wanted to make sure that I had chalk actually included with it. I'm not a fan of the way chalk feels in my hand, so I added a bit of paper around it. I also liked the way this looks and adds a bit more decoration to the project.
DESIGNER TIP | Use really strong glue to adhere the paper around the chalk. Glue to the chalk first. Let dry. Roll and glue it closed.
Thanks for stopping by to take a peek at my project!
Robbie
SUPPLIES | Midday Medley 12 x 12 Paper and Vellum Pad, Midday Medley 3D Embellishment Kit, Graceful Season 12 x 12 Premium Paper Pad, Graceful Season 6x6 Premium Paper Pad, Graceful Season Sticky 3D Embellishment Kit, Graceful Season Quilled Cardmaking Kit
Thursday, July 24, 2014
3 Birds Design | Super Fan Friday
Happy Friday 3 Birds Fans! Today, we have something fun to share with you. We have invited one of our "Super Fans" to guest design for us! May we introduce you to Ardyce Seabrook. We found her through our Instagram account. She is on Instagram as anardycecreation and we loved ALL of the 3 Birds Design projects that she has been sharing with us, so we thought it would be fun to feature her on our blog. We love the projects she created and shared with us and we think you will love them too!
Do you love 3 Birds? Make sure you let us know about it! You never know, you might be our next featured fan!
Hello, My name is Ardyce Seabrook and I am an artist at heart! I love all things crafty but I am especially passionate about scrapbooking and card making. I started creating about 12 years ago and once I started I haven't been able to stop. My scrapbooking style is pretty much whatever makes my heart content. I usually don’t have a plan, I just go with the flow. My creative flow always gets going with 3 Birds products. My products date back to when 3Birds first aired on HSN. From Ritzy Ribbon, Chick Chipboard, to the Goodie Box Of Embellishments & Sticker Nestables, their line of products always come together to make my pages look stunning. I'm on a mission to make as many scrapbook pages and cards that will decrease my inventory! (Yea Right!) I am a Mother, Wife, Daughter and Sister. I love my family and life. I am so excited to be the Guest Fan this month and truly hope my creations will inspire your next project.

First, I wanted to share my layout I created with the 3 Birds Sticker Flair Kit. It's jammed packed with over 3000 stickers and they are so yummy, gorgeous, and beautiful! With so many choices I instantly knew I wanted to do a banner that included my pictures and as many stickers that it would allow.
 First I selected a solid sheet of colored cardstock from the 3 Birds 180 piece Olivia Premium Cardstock Kit. Next I chose stickers that went well with the cardstock. I inked the edges to add dimension to all the stickers then I pop-dotted my photos and stickers that were added to the banner. I created my own flag banners by cutting down 2 long stickers and wrapping them around toothpicks and then I tucked them behind my photos in the center of the page.

I almost never journal, its very rare. I feel the right title and/or subtitles may be all you need to tell your story and explain your pictures. I chose the word "Sisters" as my title. With all the alpha stickers included in the kit I wanted to add a special touch to my title by creating a special word for each letter in the title. It really adds meaning to the pictures in the layout.

Lastly I added a border sticker at the bottom of my page for some foundation and going from the bottom up I added a few quote stickers, some chevron stickers and some bling as my final touch.

I also created a beautiful Summer card with the Sticker Flair Kit as well. I used the leftovers from the sticker sheets that I used on my layout. I inked the edges of these also.
 What I usually do (whether it's a layout or card) is lay everything down until I'm satisfied with how it looks or where everything's placed for my design. With stickers I cut each of them out and leave them on their backing. When I'm satisfied with my design I just peel them off of the backing and stick them down. I added some free hand stitching around the card.

One chevron sticker came off the edge of the card on purpose so I could cut it with the shape of the card making it almost look printed on there. I pop-dotted the summer sizzle sticker, tucked a heart sticker behind it with adding some glitter to it. Lastly I added some sequins around the circle floral sticker to complete the card.

It really has been a sizzling summer and I hope you really enjoyed my creations today!
XOXO,
Ardyce
SUPPLIES | Bazzill Basics 180 Piece Olivia Premium Cardstock Kit, Sticker Flair Kit
Do you love 3 Birds? Make sure you let us know about it! You never know, you might be our next featured fan!
Hello, My name is Ardyce Seabrook and I am an artist at heart! I love all things crafty but I am especially passionate about scrapbooking and card making. I started creating about 12 years ago and once I started I haven't been able to stop. My scrapbooking style is pretty much whatever makes my heart content. I usually don’t have a plan, I just go with the flow. My creative flow always gets going with 3 Birds products. My products date back to when 3Birds first aired on HSN. From Ritzy Ribbon, Chick Chipboard, to the Goodie Box Of Embellishments & Sticker Nestables, their line of products always come together to make my pages look stunning. I'm on a mission to make as many scrapbook pages and cards that will decrease my inventory! (Yea Right!) I am a Mother, Wife, Daughter and Sister. I love my family and life. I am so excited to be the Guest Fan this month and truly hope my creations will inspire your next project.

First, I wanted to share my layout I created with the 3 Birds Sticker Flair Kit. It's jammed packed with over 3000 stickers and they are so yummy, gorgeous, and beautiful! With so many choices I instantly knew I wanted to do a banner that included my pictures and as many stickers that it would allow.
 First I selected a solid sheet of colored cardstock from the 3 Birds 180 piece Olivia Premium Cardstock Kit. Next I chose stickers that went well with the cardstock. I inked the edges to add dimension to all the stickers then I pop-dotted my photos and stickers that were added to the banner. I created my own flag banners by cutting down 2 long stickers and wrapping them around toothpicks and then I tucked them behind my photos in the center of the page.
I almost never journal, its very rare. I feel the right title and/or subtitles may be all you need to tell your story and explain your pictures. I chose the word "Sisters" as my title. With all the alpha stickers included in the kit I wanted to add a special touch to my title by creating a special word for each letter in the title. It really adds meaning to the pictures in the layout.

Lastly I added a border sticker at the bottom of my page for some foundation and going from the bottom up I added a few quote stickers, some chevron stickers and some bling as my final touch.

I also created a beautiful Summer card with the Sticker Flair Kit as well. I used the leftovers from the sticker sheets that I used on my layout. I inked the edges of these also.
 What I usually do (whether it's a layout or card) is lay everything down until I'm satisfied with how it looks or where everything's placed for my design. With stickers I cut each of them out and leave them on their backing. When I'm satisfied with my design I just peel them off of the backing and stick them down. I added some free hand stitching around the card.
One chevron sticker came off the edge of the card on purpose so I could cut it with the shape of the card making it almost look printed on there. I pop-dotted the summer sizzle sticker, tucked a heart sticker behind it with adding some glitter to it. Lastly I added some sequins around the circle floral sticker to complete the card.

It really has been a sizzling summer and I hope you really enjoyed my creations today!
XOXO,
Ardyce
SUPPLIES | Bazzill Basics 180 Piece Olivia Premium Cardstock Kit, Sticker Flair Kit
Wednesday, July 23, 2014
Decorating A Mini Album Using Xyron Adhesives & A Giveaway
Welcome to our final day of 3 Birds projects created using the amazing adhesives from Xyron! So far this week, we have had some amazing projects including an altered wood letter and an altered burlap canvas. Today, we finish off the week with an adorable mini album by Robbie Herring.
Hi y'all! It's Robbie today. I wanted to share a mini album that I created with the Xyron Creative Station and 3 Birds products. The Xyron Creative Station is perfect for larger items that you want to turn into stickers. A mini album goes together perfectly and easily when using the Xyron Creative Station!
Here is the album that I made.
 To get started, I cut all the pieces to make my mini album out. I decided to make this a fairly small album that you be great for a gift. I used my Spellbinders dies to cut 4 pieces of chipboard and 8 pieces of paper to cover the chipboard.
Next, I fed the chipboard and 4 of the patterned paper pieces through the Xyron Creative Station.

DESIGNER TIP | To make your adhesive go as far as possible, use the tray to place them close to the previous pieces. Don't cut them until you have fed all the pieces through the machine.
Now you are ready to adhere your paper to build your album! One side of the chipboard will have adhesive, so use one of the pieces that you didn't feed through to cover that side. You will then use a piece of the adhesive covered paper for the other side of the chipboard.
 I also used the Spellbinder's dies to cut an additional piece of paper for the top of each page of my album. These pieces were added using my Xyron Mega Runner. I wanted to have the option to curl or distress the edges, so I didn't want these pieces covered completely with adhesive. The Mega Runner was perfect! It does a great job of holding things firmly!

The next steps were a few details and then putting it together.
I love the look of stitching to add detail, but it can be a bit tough on a mini album to make it look right on both sides. To get a similar look quickly and easily, I just used my Souffle pens and did a quick outline around each page.

To put it all together, I added eyelets to each page and used a ring to hold it all together. And of course, I added a bow!
Time to start embellishing! I used a few things from both Graceful Season and Midday Medley for my album. Paper, chipboard, punched leaves and flowers were the choices I made. The collections have so many embellishment choices and complement each other so well. It really makes embellishing easy.

I loved how easy this went together using the Creative Station! Don't forget that Xyron makes so many other great products!
To see the inside of My Favorite Moments Mini Album, be sure to stop by my blog! I have it all finished for you to see today!
Thanks so much for stopping by to see my project!
Robbie
SUPPLIES | Midday Medley Paper Collection, Midday Medley 3D Embellishment Kit, Graceful Season Paper Collection, Graceful Season Sticky Sparkly Chipboard Shapes
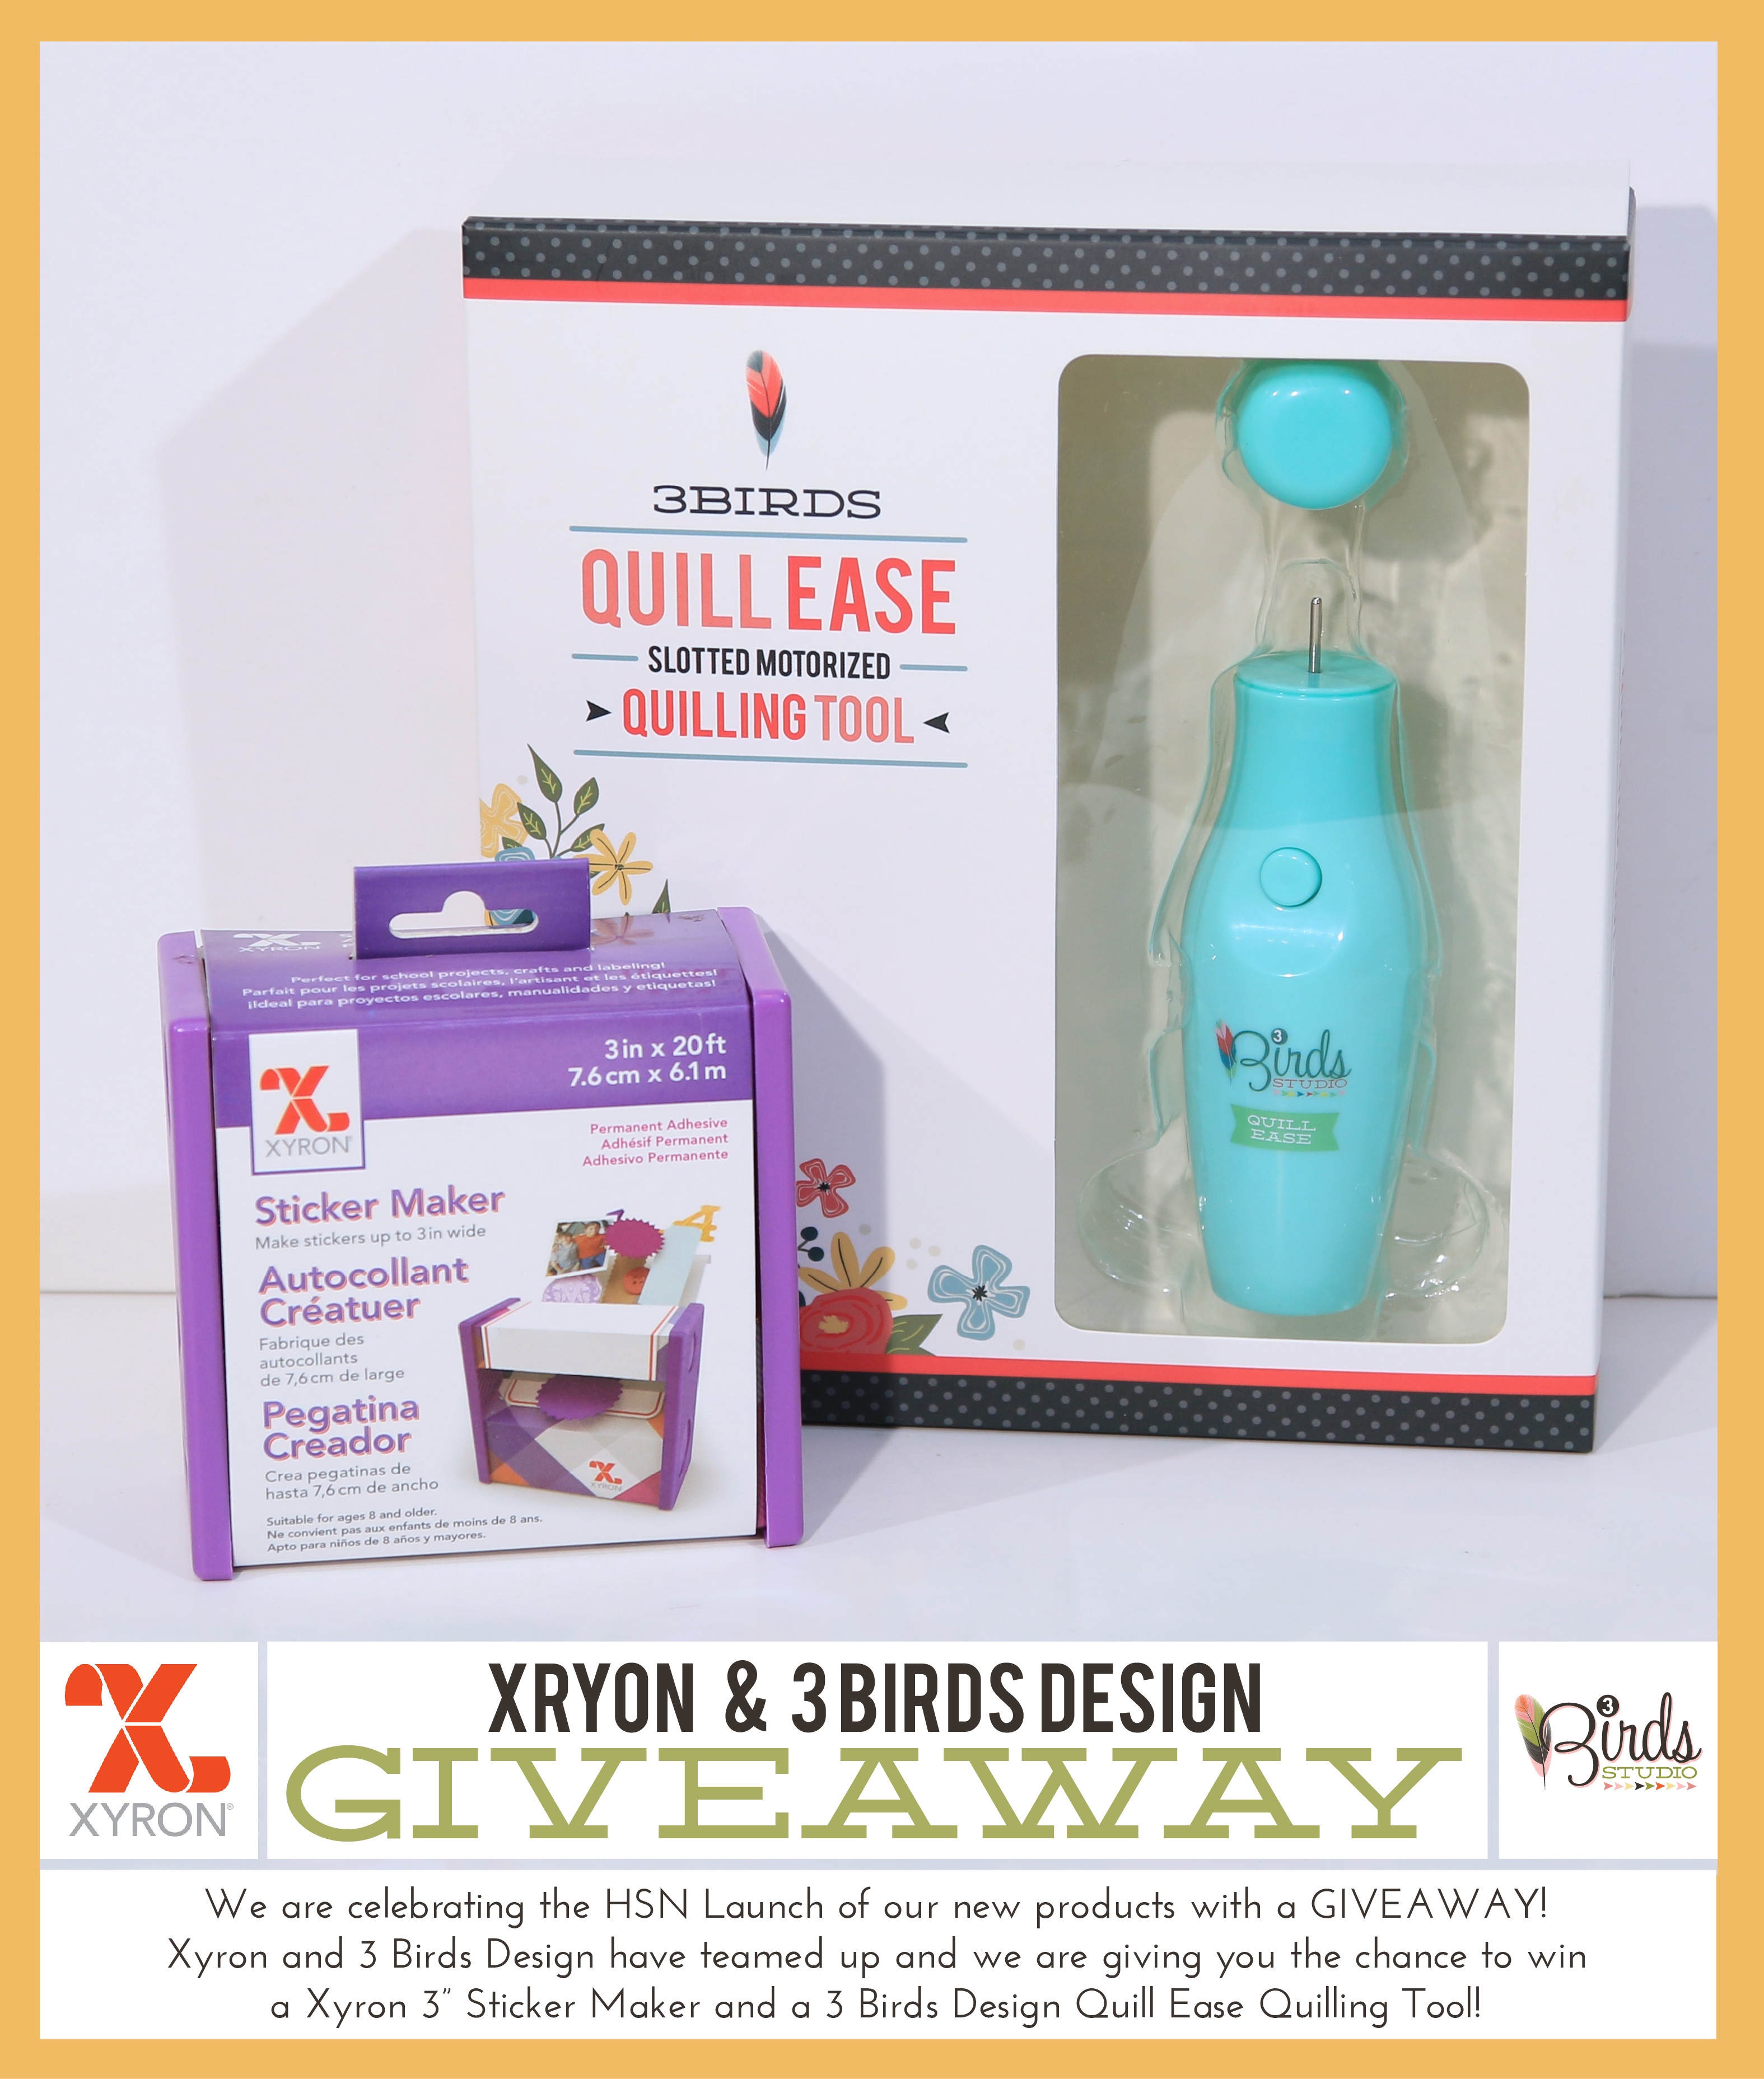
Don't forget to enter to WIN one of two amazing prize packages as we celebrate the HSN Launch of our new products and the generosity of our friends at Xyron! Click on this link to enter for your chance to WIN - http://tinyurl.com/kc3gxfa
Visit the Xyron blog and Facebook page for more inspiration and ideas on using their products and make sure you let them know that 3 Birds sent you!!
Hi y'all! It's Robbie today. I wanted to share a mini album that I created with the Xyron Creative Station and 3 Birds products. The Xyron Creative Station is perfect for larger items that you want to turn into stickers. A mini album goes together perfectly and easily when using the Xyron Creative Station!
Here is the album that I made.
 To get started, I cut all the pieces to make my mini album out. I decided to make this a fairly small album that you be great for a gift. I used my Spellbinders dies to cut 4 pieces of chipboard and 8 pieces of paper to cover the chipboard.
Next, I fed the chipboard and 4 of the patterned paper pieces through the Xyron Creative Station.

DESIGNER TIP | To make your adhesive go as far as possible, use the tray to place them close to the previous pieces. Don't cut them until you have fed all the pieces through the machine.
Now you are ready to adhere your paper to build your album! One side of the chipboard will have adhesive, so use one of the pieces that you didn't feed through to cover that side. You will then use a piece of the adhesive covered paper for the other side of the chipboard.
 I also used the Spellbinder's dies to cut an additional piece of paper for the top of each page of my album. These pieces were added using my Xyron Mega Runner. I wanted to have the option to curl or distress the edges, so I didn't want these pieces covered completely with adhesive. The Mega Runner was perfect! It does a great job of holding things firmly!
The next steps were a few details and then putting it together.
I love the look of stitching to add detail, but it can be a bit tough on a mini album to make it look right on both sides. To get a similar look quickly and easily, I just used my Souffle pens and did a quick outline around each page.

To put it all together, I added eyelets to each page and used a ring to hold it all together. And of course, I added a bow!
Time to start embellishing! I used a few things from both Graceful Season and Midday Medley for my album. Paper, chipboard, punched leaves and flowers were the choices I made. The collections have so many embellishment choices and complement each other so well. It really makes embellishing easy.

I loved how easy this went together using the Creative Station! Don't forget that Xyron makes so many other great products!
To see the inside of My Favorite Moments Mini Album, be sure to stop by my blog! I have it all finished for you to see today!
Thanks so much for stopping by to see my project!
Robbie
SUPPLIES | Midday Medley Paper Collection, Midday Medley 3D Embellishment Kit, Graceful Season Paper Collection, Graceful Season Sticky Sparkly Chipboard Shapes
Don't forget to enter to WIN one of two amazing prize packages as we celebrate the HSN Launch of our new products and the generosity of our friends at Xyron! Click on this link to enter for your chance to WIN - http://tinyurl.com/kc3gxfa
Visit the Xyron blog and Facebook page for more inspiration and ideas on using their products and make sure you let them know that 3 Birds sent you!!
Tuesday, July 22, 2014
Adhering Vellum on a Scrapbook Page Using the Xyron Creative Station & a Giveaway
Happy Wednesday Little Birdies! Hope that you are tuning in to HSN today for all of the new 3 Birds Goodness happening there today! It’s Chasity here today with a peek into the nest, and my very messy, messy desk! But hey, who ever said that creativity is clean!?! (All of the other Birdies at the Nest will tell you that MY desk is perpetually a major disaster…)
But no time to tidy, I’m too excited to put this little green machine on my work desk! A huge thank you to our Xyron friends for sharing such an awesome tool with us!

It just so happens to be perfect timing to have this awesome adhesive tool, the Xyron Creative Station, with the launch of the new Midday Medley Paper pack with printed vellum. A perfect pair! Printed vellum is so beautiful, but sometimes poses a problem when trying to adhere it to another surface or paper. Because of its translucent appearance, most adhesives show through. BUT NOT TODAY! The Creative Station transfers a full coverage, seamless adhesive across the entire area of the paper! Magic! This tool was a real time saver while getting samples ready for the upcoming show!
I found the machine to be very easy to use; I love how the side panels fold in for storage! Clever!
Here you will see what the vellum looks like run through the machine. I like having the option of running small pieces, or large pieces through the same machine.
 I was excited at how easily the vellum peeled away from the backing. As Juliana pointed out, no wrinkles or tears! Even with vellum paper.


See how you can still see through the vellum paper without actually seeing the adhesive? WOW!
Next is the beginning of my layout for the HSN show, with the vellum adhered to the background paper.
 I am just so impressed with how this adhesive handles vellum. I think every messy desk needs a little green machine!
This is the completed layout using the new Midday Medley Collection. I hope that you tune in today to HSN and see this layout in action! The new Midday Medley Collection products coordinate so you can craft with confidence no matter which products you snag for yourself!

DESIGNER TIP | I will leave you with a quick tip. The printed vellum papers in the Midday Medley Paper Pack make beautiful flower embellishments for projects! Hand cut the swirl shapes, or use your electronic cutting machine! I used a quilling tool to wrap the flower. The vellum holds its shape surprisingly well, even when you remove it from the quilling tool! A little glue to the base, press the center down and voila, elegant but easy vellum flower embellishments! Here’s a close up to show you just how fun these quilled vellum flowers can be! Hope you enjoy!


SUPPLIES | Midday Medley Paper Collection, Midday Medley Nestable Festival Sticker Kit, Midday Medley 3D Embellishment Kit, Sticker Flair Mega Sticker Kit
Don’t forget to enter to WIN one of two amazing prize packages as we celebrate the HSN Launch of our new products and the generosity of our friends at Xyron! Click on this link to enter for your chance to WIN – http://tinyurl.com/kc3gxfa

Visit the Xyron blog and Facebook page for more inspiration and ideas on using their products and make sure you let them know that 3 Birds sent you!!!
But no time to tidy, I’m too excited to put this little green machine on my work desk! A huge thank you to our Xyron friends for sharing such an awesome tool with us!

It just so happens to be perfect timing to have this awesome adhesive tool, the Xyron Creative Station, with the launch of the new Midday Medley Paper pack with printed vellum. A perfect pair! Printed vellum is so beautiful, but sometimes poses a problem when trying to adhere it to another surface or paper. Because of its translucent appearance, most adhesives show through. BUT NOT TODAY! The Creative Station transfers a full coverage, seamless adhesive across the entire area of the paper! Magic! This tool was a real time saver while getting samples ready for the upcoming show!
I found the machine to be very easy to use; I love how the side panels fold in for storage! Clever!
Here you will see what the vellum looks like run through the machine. I like having the option of running small pieces, or large pieces through the same machine.
 I was excited at how easily the vellum peeled away from the backing. As Juliana pointed out, no wrinkles or tears! Even with vellum paper.

See how you can still see through the vellum paper without actually seeing the adhesive? WOW!
Next is the beginning of my layout for the HSN show, with the vellum adhered to the background paper.
 I am just so impressed with how this adhesive handles vellum. I think every messy desk needs a little green machine!
This is the completed layout using the new Midday Medley Collection. I hope that you tune in today to HSN and see this layout in action! The new Midday Medley Collection products coordinate so you can craft with confidence no matter which products you snag for yourself!

DESIGNER TIP | I will leave you with a quick tip. The printed vellum papers in the Midday Medley Paper Pack make beautiful flower embellishments for projects! Hand cut the swirl shapes, or use your electronic cutting machine! I used a quilling tool to wrap the flower. The vellum holds its shape surprisingly well, even when you remove it from the quilling tool! A little glue to the base, press the center down and voila, elegant but easy vellum flower embellishments! Here’s a close up to show you just how fun these quilled vellum flowers can be! Hope you enjoy!


SUPPLIES | Midday Medley Paper Collection, Midday Medley Nestable Festival Sticker Kit, Midday Medley 3D Embellishment Kit, Sticker Flair Mega Sticker Kit
Don’t forget to enter to WIN one of two amazing prize packages as we celebrate the HSN Launch of our new products and the generosity of our friends at Xyron! Click on this link to enter for your chance to WIN – http://tinyurl.com/kc3gxfa
Visit the Xyron blog and Facebook page for more inspiration and ideas on using their products and make sure you let them know that 3 Birds sent you!!!
Monday, July 21, 2014
Altered Burlap Canvas Using Xyron Adhesives & A Giveaway
Welcome to our second day of projects created by our amazing 3 Birds Design Team using products from our friends at Xyron! Yesterday, we had an amazing altered wood letter by Juliana Michaels. We continue the home decor theme today with an altered canvas by Mary Ann Jenkins.
Hi friends, it’s Mary Ann here today with a fun little piece of home décor to share! One of the highlights of my project was using the Xyron Creative Station and 3” Sticker Maker, that were so generously given to all the design team members to show the many different ways this amazing adhesive can be used. I used the Creative Station with the adhesive cartridge, but it can also be used to make magnets and for laminating too! And now on to my project…

 I started with a burlap canvas panel I found at my local craft store, and added a bit of white paint and a few splatters of coral and teal mist.
 Next, I chose the green oval stripe sticker from the Midday Medley Nestable Festival Sticker Pad and layered it over the floral patterned paper, cut the banner shape from the pink striped paper, and die cut the doily shaped from a piece of coordinating cardstock. I laid all the pieces along with the “Find a Favorite Little Memory” and green polka dot banner shaped sticker gently on my burlap panel to check for placement and see how it would all fit together.
 Since I am using the burlap panel, I didn’t want to use a liquid glue that could warp the panel, so using the Xyron Creative Station was the perfect answer to add adhesive to all the various pieces of papers.

 For the smaller stems of leaves, the 3” Sticker Maker was ideal to use.
 After adhering all the pieces to the burlap panel, I added the sweet little birds nest (also found at my local craft store) with a bit of hot glue, made a tiny little flower with the a strip of paper from the Graceful Season Quilled Cardmaking kit and added it to the birds nest, then add the “favorite memory” sticker with some foam tape for a bit of dimension.
I really like how well the pieces adhered to the burlap using the Xyron adhesive! A strong hold, without having to use a liquid glue. I will definitely be using my Xyron Creative Station for many more of my crafting projects!
Mary Ann
SUPPLIES | Midday Medley Paper Collection, Midday Medley Nestable Festival Sticker Pad, Graceful Season Quilled Cardmaking Kit
Don't forget to enter to WIN one of two amazing prize packages as we celebrate the HSN Launch of our new products and the generosity of our friends at Xyron! Click on this link to enter for your chance to WIN - http://tinyurl.com/kc3gxfa
Visit the Xyron blog and Facebook page for more inspiration and ideas on using their products and make sure you let them know that 3 Birds sent you!!!
Hi friends, it’s Mary Ann here today with a fun little piece of home décor to share! One of the highlights of my project was using the Xyron Creative Station and 3” Sticker Maker, that were so generously given to all the design team members to show the many different ways this amazing adhesive can be used. I used the Creative Station with the adhesive cartridge, but it can also be used to make magnets and for laminating too! And now on to my project…

 I started with a burlap canvas panel I found at my local craft store, and added a bit of white paint and a few splatters of coral and teal mist.
 Next, I chose the green oval stripe sticker from the Midday Medley Nestable Festival Sticker Pad and layered it over the floral patterned paper, cut the banner shape from the pink striped paper, and die cut the doily shaped from a piece of coordinating cardstock. I laid all the pieces along with the “Find a Favorite Little Memory” and green polka dot banner shaped sticker gently on my burlap panel to check for placement and see how it would all fit together.
 Since I am using the burlap panel, I didn’t want to use a liquid glue that could warp the panel, so using the Xyron Creative Station was the perfect answer to add adhesive to all the various pieces of papers.
 For the smaller stems of leaves, the 3” Sticker Maker was ideal to use.
 After adhering all the pieces to the burlap panel, I added the sweet little birds nest (also found at my local craft store) with a bit of hot glue, made a tiny little flower with the a strip of paper from the Graceful Season Quilled Cardmaking kit and added it to the birds nest, then add the “favorite memory” sticker with some foam tape for a bit of dimension.
I really like how well the pieces adhered to the burlap using the Xyron adhesive! A strong hold, without having to use a liquid glue. I will definitely be using my Xyron Creative Station for many more of my crafting projects!
Mary Ann
SUPPLIES | Midday Medley Paper Collection, Midday Medley Nestable Festival Sticker Pad, Graceful Season Quilled Cardmaking Kit
Don't forget to enter to WIN one of two amazing prize packages as we celebrate the HSN Launch of our new products and the generosity of our friends at Xyron! Click on this link to enter for your chance to WIN - http://tinyurl.com/kc3gxfa
Visit the Xyron blog and Facebook page for more inspiration and ideas on using their products and make sure you let them know that 3 Birds sent you!!!