Welcome everyone! It's Juliana here, and today I am sharing with you an altered wood letter that I created using the Xyron Creative Station along with our new 3 Birds Quill Ease Quilling Tool and Midday Medley Paper Collection.
As you may recall, I shared a Quilled Altered Wood Letter last week on the blog. Today I am sharing a similar letter, however today I'm going to show you how I adhered the patterned paper to the wood letter using the Xyron Creative Station. This machine is wonderful for applying adhesive to large surface areas. It also won't buckle or warp your paper.

I began by creating my quilled flowers, leaves and swirls. I used the Quill Ease Quilling Tool for many of these shapes. I am so amazed at how much time it saves me to use this new tool when creating the basic coiled shapes. Once I had determined the placement for all of the elements, I took a quick photo using my camera phone. I always do this to to help me remember where all of the flowers go when it is time to adhere them to my project.
 TUTORIAL | ALTERED WOOD LETTER WITH PATTERNED PAPER USING THE XYRON CREATIVE STATION
For this project, begin with a wooden letter. I found this one at my local Michael's craft store.

Select a piece of patterned paper that coordinates well with the embellishments you want to use.

Turn the paper over and the letter over so that the back side of each is facing up toward you. Place the letter onto the paper and trace around the outside shape of the letter using a pencil.

Cut out the letter shape. Measure the width of the sides of the letter. Cut three 1" x 12" strips from the same paper.
 Place the cut out shapes into the Xyron Creative Station with the printed side facing up. Turn the hand and guide the paper pieces into the machine.

As the paper moves through the machine, adhesive is applied to the back side of each piece. Use the cutting bar included with the machine and trim off the piece once it has gone through the machine.
 Remove the pieces from the backing material and adhere them to your letter.
 Use a sanding block to smooth the edges once you have adhered the paper to the wood letter.
 Attach the long strips to cover the sides of the letter. Trim them as needed. Use the sanding block again to smooth the edges once all of the paper is adhered.
 Now you are ready to add your quilled flowers and swirls or other embellishments.
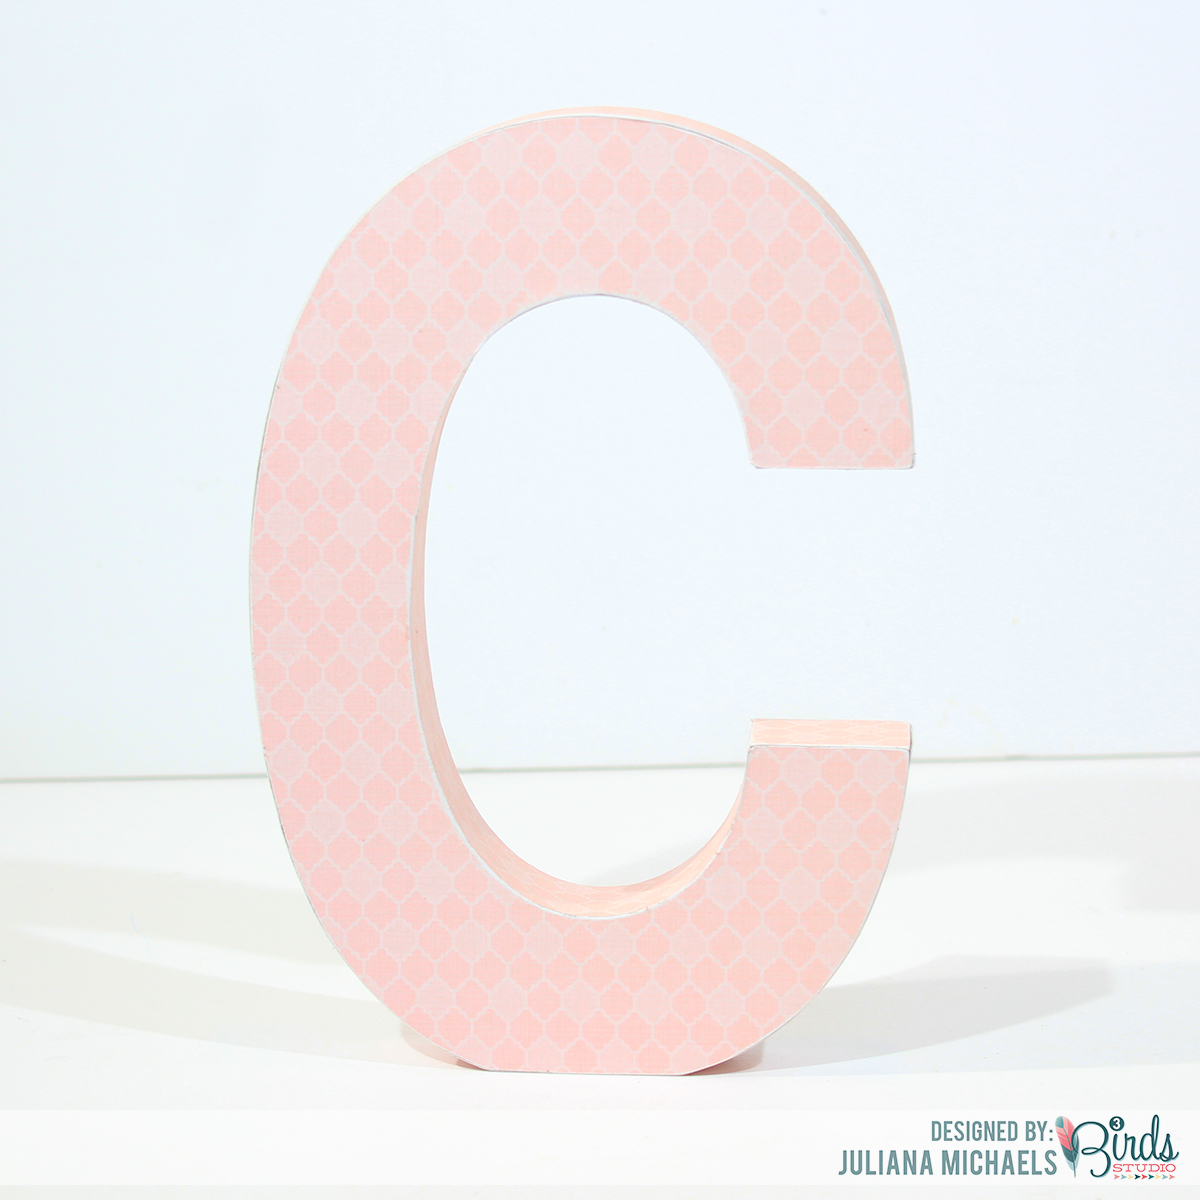 To decorate my letter, I used a few dimensional flowers from our Quilled Cardmaking Kit to create the yellow flower along with strips from the Quill Ease Quilling Took bundle. To finish the flowers, I added adhesive backed pearls to the center of each flower.

I hope you enjoyed learning about the Xyron Creative Station and how easy it makes applying adhesive to large surfaces. It's really ideal to use when creating home decor type pieces.
HUGS!
Juliana
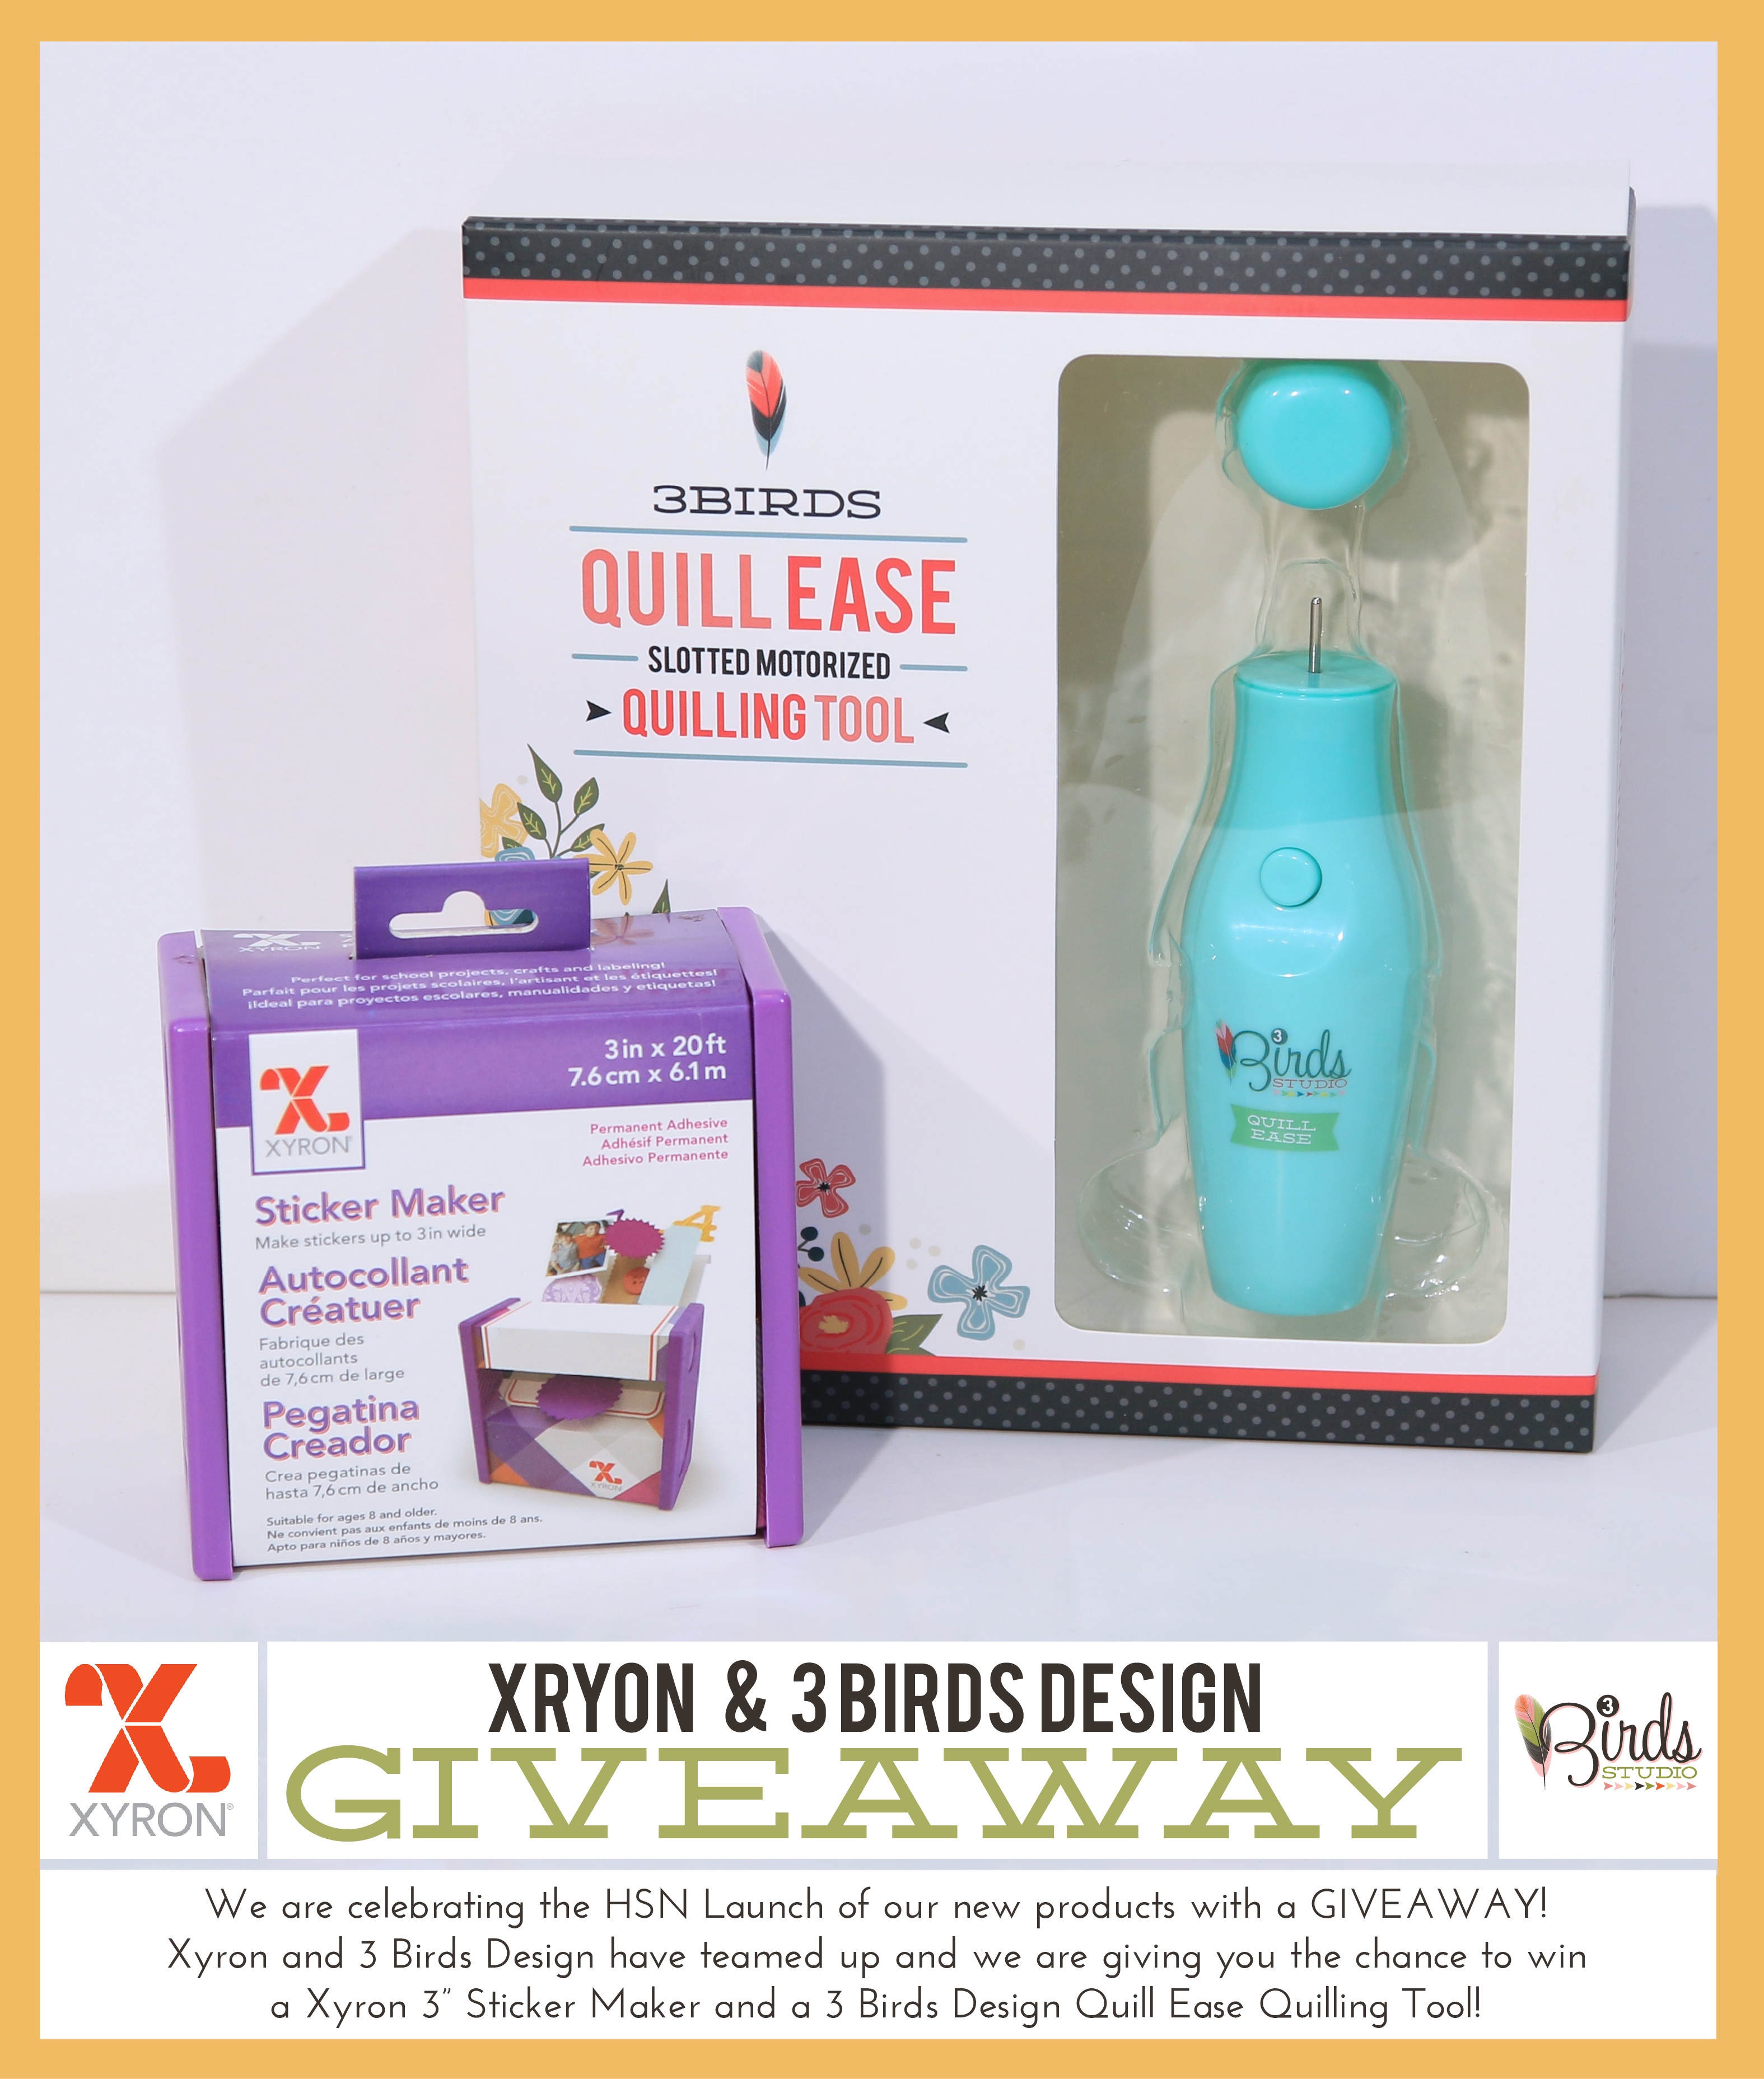
SUPPLIES | Quill Ease Quilling Tool, Midday Medley Patterned Collection, Quilled Cardmaking Kit
Visit the Xyron blog and Facebook page for more inspiration and ideas on using their products and make sure you let them know that 3 Birds sent you!!!
Now for the best part...the GIVEAWAY! By clicking on the link, you can enter for your chance to win either a Xyron 3" Sticker Maker and a 3 Birds Quill Quilling Tool or a Xyron 3" Sticker Maker and a Timeless Stamp Kit! The giveaway opens today and continues until Monday, July 28. We will announce the winner next week. Good luck and thank you so much for stopping by today!!!
CLICK ON THIS LINK TO ENTER OUR GIVEAWAY - http://tinyurl.com/kc3gxfa


This is just lovely!
ReplyDelete[…] amazing 3 Birds Design Team using products from our friends at Xyron! Yesterday, we had an amazing altered wood letter by Juliana Michaels. We continue the home decor theme today with an altered canvas by Mary Ann […]
ReplyDeleteThanks so much Audrey!
ReplyDelete